●Deploy
Your Mailing server can be deployed as a production website (example). The production build excludes development features like livereload and is optimized for performance.
Why deploy?
- Share previews with clients and your team
- Email service with REST API
- User-friendly email settings portals with Lists
Vercel
The easiest way to deploy your preview server is via Vercel's UI. Under the hood, mailing is a Next.js application and Vercel is great at hosting these. Configuring your deployment this way will also give you easy previews on PRs and automatic deployments from your main branch.
- Create a new project on vercel.com
- Connect it to your git repository
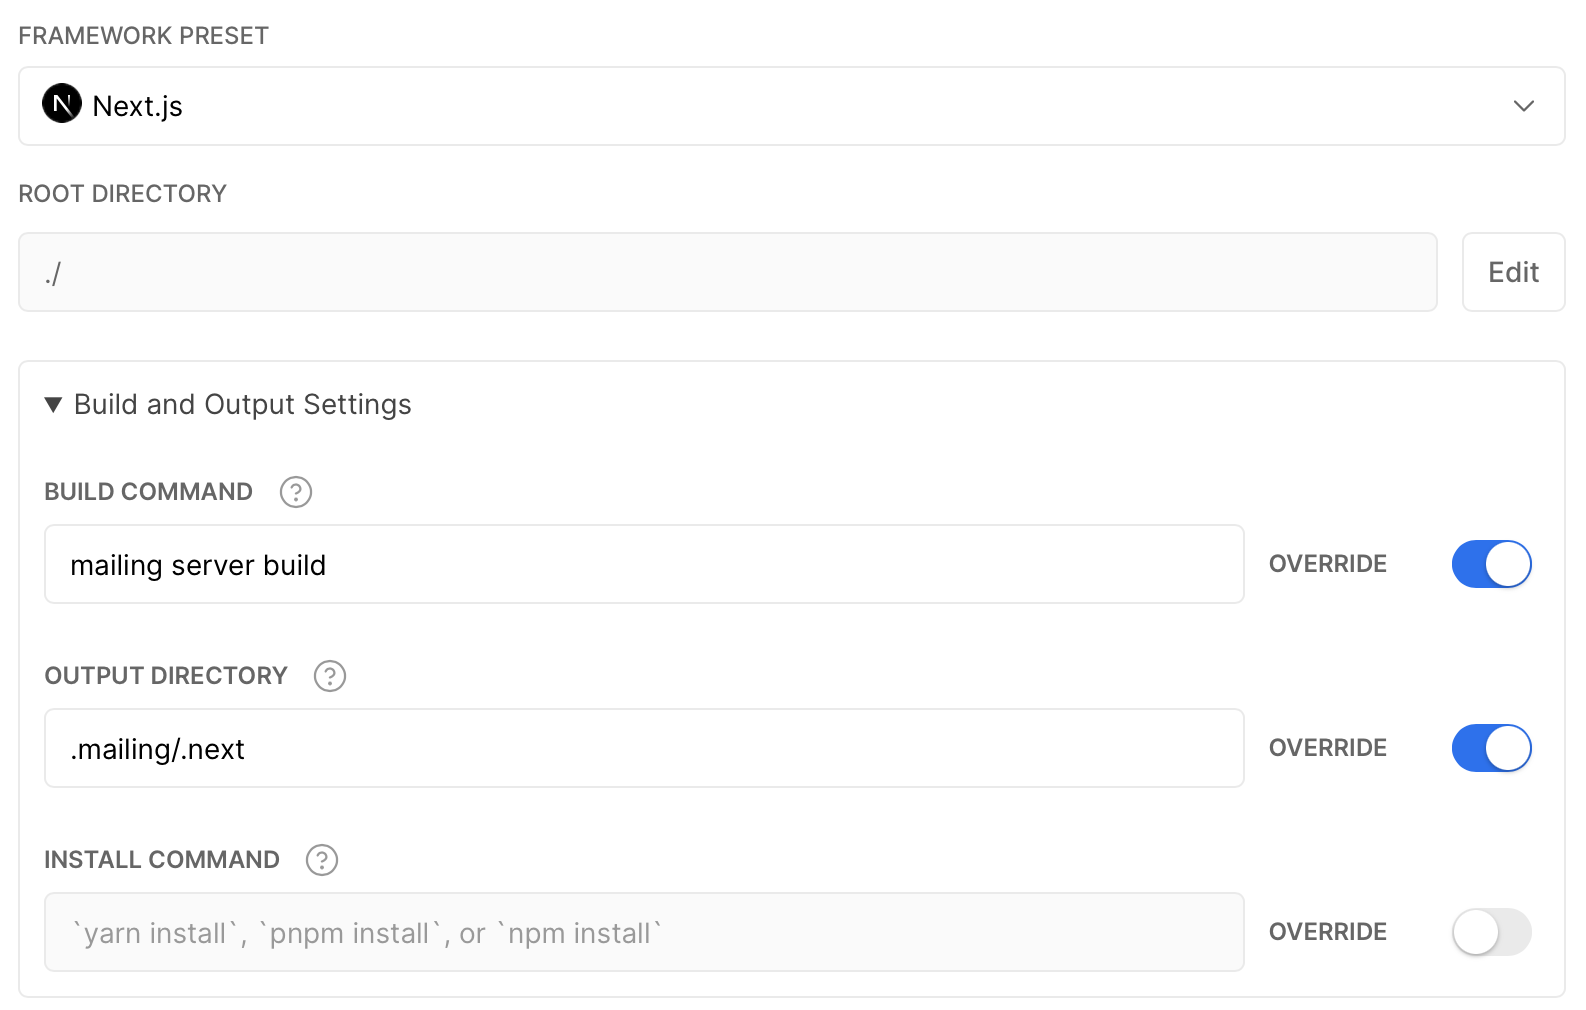
- Configure the build command to run
npx mailing server build - Configure the output directory to be
.mailing/.next
Here’s a working Vercel configuration:
Netlify
- Install the Netlify NextJS plugin:
yarn add @netlify/plugin-nextjs - Create a
netlify.tomlin your project root with the plugin enabled:
[[plugins]]
package = "@netlify/plugin-nextjs"
- In the Netlify deploy settings, set the "build command" to
yarn install && yarn mailing server buildand set "publish directory" to.mailing/.next
Other hosts
If you want to deploy somewhere else, you can use npx mailing server build to build the production app and npx mailing server start to boot it on localhost.
Your mailing deploy is a perfectly useful way to view your email previews. But adding a database unlocks another level of functionality.
Adding a database to your Mailing deployment allows you to create an API key and perform priveleged actions. This includes paid Mailing Platform features as well as the ability to use the sendMail REST API, a free feature.
1. Deploy your Mailing server
See above if you haven't done this.
2. Connect a database
To use Lists, you’ll need to deploy mailing and connect
it to a postgres database by setting MAILING_DATABASE_URL
in your deploy environment. We recommend neon.tech.
We’re happy to do this for you, ping in the discord and
we’ll set up a Neon database for you to connect to.
Because the API is serverless, it’s important that you use
a postgres service like neon that can handle a high number of connections.
3. Create an account
This secures your database. Navigate to /signup on your production instance of Mailing and set up a new account. This secures your deployment and will automatically create your Default list and an API key to use /api/sendMail as well. (Note: at the moment, we only allow one user to sign up per instance). If you need to login again in the future, visit /login. 4. Configure your clients with the api key. Any app that's calling sendMail is a client.
4. Set env variables
Set env variables in the environments you use sendMail from:
MAILING_API_URL- the url of your deployed mailing instance (e.g.'https://mailing.yourdomain.com')MAILING_API_KEY- an api key from$MAILING_API_URL/settings
Example .env file:
MAILING_API_URL=https://mailing.yourdomain.com
MAILING_API_KEY=yourapikey